
galileo telescope instructions
Galileo’s Telescope: An Overview
Galileo’s telescope, a simple refracting instrument, revolutionized astronomy in the 17th century․ Using lenses, it allowed unprecedented views of celestial objects, leading to groundbreaking discoveries and challenging existing cosmological beliefs․
Basic Design of Galileo’s Telescope
Galileo’s telescope was a marvel of simplicity, yet profoundly impactful․ Its core design featured a refracting system, utilizing two lenses housed within a tube․ The objective lens, positioned at the front, gathered and focused incoming light, while the eyepiece lens, located at the rear, magnified the focused image for the observer․ Unlike modern telescopes, Galileo’s instrument produced an upright, but diminished, field of view․
The lenses themselves were crucial․ The objective lens was a plano-convex lens, thicker in the middle and flat on one side, designed to bend the light․ The eyepiece, a plano-concave lens, was thinner in the middle, diverging the light rays to create magnification․

The tube, often constructed from materials like wood or cardboard, served as a light shield, minimizing stray light and enhancing image contrast․ Despite its modest design, Galileo’s telescope unveiled celestial wonders previously unseen by human eyes․
Refracting Telescope Principles

Refracting telescopes, like Galileo’s, operate on the principle of refraction, the bending of light as it passes from one medium to another․ In this case, light travels from air into the glass of the lenses․ The objective lens, typically convex, bends the incoming parallel rays of light from a distant object to converge at a focal point, creating a real image․
The eyepiece lens, usually concave in Galilean telescopes, intercepts these converging light rays before they reach the focal point․ It then diverges the light, making it appear as though the image is coming from a much larger angle, thus magnifying it for the observer․ The amount of magnification is determined by the ratio of the objective lens’s focal length to the eyepiece lens’s focal length․
This simple yet effective system allows for the observation of distant objects with greater clarity and detail than the naked eye, revolutionizing our understanding of the cosmos․
Assembly Instructions for Galileo-Type Telescopes
Constructing a Galilean telescope involves carefully assembling lenses within a tube․ Accurate alignment is crucial for optimal viewing․ This guide provides a step-by-step process for building your own․
Essential Components for Assembly
To embark on constructing your own Galilean telescope, you’ll need several essential components․ Firstly, acquire two lenses: a convex objective lens with a long focal length and a concave eyepiece lens with a shorter focal length․ The objective lens gathers light, while the eyepiece magnifies the image․
Next, secure a sturdy tube, typically made of cardboard or PVC pipe, to house the lenses․ The tube’s length should roughly correspond to the sum of the lenses’ focal lengths․ Additionally, you’ll require lens holders or adapters to securely mount the lenses within the tube, ensuring proper alignment․
Furthermore, gather materials for focusing, such as sliding tubes or a rack-and-pinion mechanism․ These allow you to adjust the distance between the lenses for optimal image clarity․ Finally, consider acquiring tools like a ruler, cutting tools, and adhesive to facilitate the assembly process․ Precise measurements and careful construction are key to achieving a functional telescope․
Step-by-Step Assembly Guide
Begin by carefully measuring the inner diameter of your tube․ Cut two lens holders or adapters that snugly fit inside the tube․ Create openings in the center of each holder to accommodate the lenses․ Securely mount the convex objective lens in one holder and the concave eyepiece lens in the other, ensuring they are centered․
Slide the objective lens holder into one end of the tube․ If using sliding tubes for focusing, insert the smaller tube into the larger one․ Then, insert the eyepiece lens holder into the other end of the sliding tube․ Adjust the distance between the lenses by sliding the tubes until you achieve a clear image․
If using a rack-and-pinion mechanism, attach it to the tube near the eyepiece end․ Connect the eyepiece lens holder to the rack, allowing for precise focusing adjustments․ Secure all components with adhesive or screws, ensuring stability․ Test the telescope by aiming it at a distant object and fine-tuning the focus for optimal viewing․
Operating Instructions for Optimal Viewing
To achieve optimal viewing, begin by focusing the telescope․ Then, locate celestial objects using a star chart․ Finally, understand the magnification to enhance your astronomical observations and experience the wonders of the cosmos․
Focusing the Telescope
Achieving a sharp image with a Galilean telescope requires careful focusing․ Since these telescopes lack a modern focusing mechanism, the process involves adjusting the distance between the objective and eyepiece lenses․ Start by pointing the telescope at a bright, distant object during the day, like a building or a tree․
Gently slide the drawtube, which holds the eyepiece, in or out of the main tube․ Observe the image quality as you make these adjustments․ The goal is to find the point where the object appears clearest and most defined․ This may require patience, as the optimal focus can be sensitive to even slight movements․
Once you’ve found the approximate focal point, make finer adjustments to sharpen the image further․ If the image appears blurry or distorted, try adjusting the telescope’s position to minimize vibrations or atmospheric disturbances․ Remember, achieving perfect focus can be challenging, but with practice, you’ll become adept at obtaining clear, detailed views․
Finding Celestial Objects
Locating celestial objects with a Galilean telescope, which lacks advanced features like finderscopes or GoTo systems, requires patience and a systematic approach․ Begin by understanding the night sky and familiarizing yourself with constellations․ Use star charts or astronomy apps to identify bright stars and planets visible in your area․
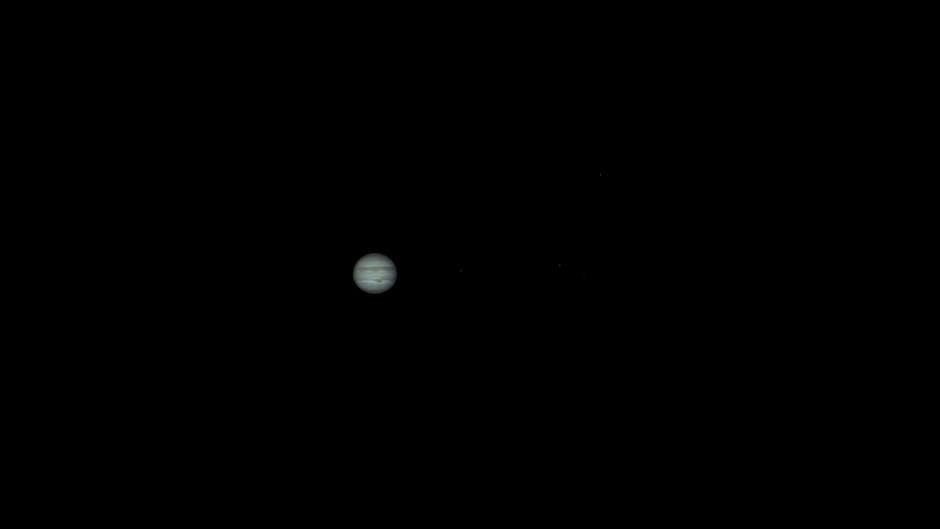
Start with easy-to-find objects like the Moon or bright planets such as Venus or Jupiter․ Point the telescope in the general direction of the object․ Since the field of view is narrow, sweep the telescope slowly across the sky․ Use a low magnification eyepiece initially to increase the field of view․
Once you’ve located the object, center it in the field of view and gradually increase magnification for a closer look․ Remember that Galilean telescopes produce inverted images, which can be disorienting at first․ Practice regularly to develop your observing skills and learn to navigate the night sky effectively․ With time, you’ll be able to find a wider range of celestial wonders․
Understanding Magnification
Magnification in a Galilean telescope is determined by the ratio of the focal length of the objective lens to the focal length of the eyepiece․ A higher ratio results in greater magnification, allowing for a closer view of celestial objects․ However, it’s crucial to understand that magnification is not the only factor determining image quality․
Excessive magnification can lead to a dimmer and less sharp image, as the light is spread over a larger area․ The “empty magnification” phenomenon occurs when increasing magnification reveals no new details, only blurring and distortion․ Start with a low magnification eyepiece to maximize brightness and field of view․
Gradually increase magnification as needed to observe finer details, but be mindful of image quality․ Atmospheric conditions, telescope optics, and the observer’s eyesight all influence the optimal magnification․ Experiment with different eyepieces to find the best balance between magnification and clarity for the object being observed․ Higher magnification isn’t always better; prioritize a bright, sharp image over extreme magnification․
Maintenance and Care
Proper maintenance ensures longevity and optimal performance of your Galileo-type telescope․ Regular cleaning and careful storage are essential․ Handle the lenses with care to avoid scratches and maintain clear views․

Cleaning the Lenses
Maintaining the clarity of your Galileo-type telescope’s lenses is crucial for optimal viewing․ Dust and fingerprints can significantly impair image quality, so regular cleaning is necessary․ However, it’s important to proceed with caution to avoid scratching or damaging the delicate glass surfaces․
Before cleaning, always inspect the lens surface for any loose particles․ Use a soft brush, such as a camel hair brush, or a can of compressed air to gently remove any dust or debris․ Avoid rubbing the lens, as this can grind particles into the surface and cause scratches․
For fingerprints or stubborn smudges, use a specialized lens cleaning solution and lint-free microfiber cloth․ Apply a small amount of cleaning solution to the cloth, never directly to the lens․ Gently wipe the lens in a circular motion, starting from the center and working your way outwards․ Avoid applying excessive pressure․
After cleaning, inspect the lens for any remaining streaks or residue․ If necessary, use a fresh, clean section of the microfiber cloth to buff the lens until it is clear․ Store your telescope in a clean, dry environment to minimize dust accumulation․
Proper Storage
Ensuring the longevity and optimal performance of your Galileo-type telescope hinges significantly on proper storage techniques․ Exposure to dust, moisture, and extreme temperatures can degrade the lenses and mechanical components, ultimately diminishing its observational capabilities․ Therefore, adopting a meticulous storage protocol is paramount․
Ideally, the telescope should be stored in a dedicated case or container designed to shield it from environmental hazards․ This case should be lined with soft, non-abrasive material to prevent scratches and cushion the telescope during handling and transport; Ensure the lenses are covered with protective caps to prevent dust accumulation․
The storage location should be a cool, dry environment, away from direct sunlight and humidity fluctuations․ Avoid storing the telescope in attics, basements, or garages where temperature and humidity levels are prone to extremes․ A closet or storage room within a climate-controlled living space is generally preferable․
Before long-term storage, thoroughly clean the lenses and ensure all components are dry․ Consider using desiccant packs within the storage case to absorb any residual moisture․ Regularly inspect the telescope for signs of damage or deterioration, addressing any issues promptly․
Historical Context of Galileo’s Telescope
Galileo’s telescope emerged in the early 17th century, building upon earlier lens technology․ It marked a pivotal moment, enabling unprecedented astronomical observations that challenged established geocentric views and revolutionized our understanding of the cosmos․
Galileo’s Discoveries with His Telescope
Galileo Galilei’s pioneering use of the telescope in astronomy led to a series of transformative discoveries that reshaped our understanding of the universe; In 1609, after learning about the newly invented telescope, Galileo constructed his own improved versions, which allowed him to observe the heavens with unprecedented clarity․
One of his earliest and most significant findings was the observation of the Moon․ He detailed that it was not smooth but was uneven, and had many cavities, just like the surface of the Earth․ Another major discovery was the detection of four celestial bodies, later identified as moons, orbiting Jupiter, which challenged the geocentric model of the universe․
Galileo also observed that Venus exhibited phases similar to the Moon, supporting the heliocentric model, where planets orbit the Sun․ His observations of sunspots further contradicted the Aristotelian view of an unchanging, perfect cosmos, solidifying the telescope’s role in astronomical exploration․
Impact on Astronomy
Galileo’s telescopic observations had a profound and lasting impact on the field of astronomy, ushering in a new era of empirical observation and challenging long-held cosmological beliefs․ His discoveries provided strong evidence for the heliocentric model of the solar system, which posits that the Earth and other planets revolve around the Sun, rather than the Earth being at the center of the universe․
The observation of Jupiter’s moons, lunar craters, and Venus’s phases directly contradicted the Aristotelian view of a perfect, unchanging cosmos․ This evidence helped to initiate a paradigm shift in scientific thought, promoting the use of observation and experimentation in the pursuit of knowledge․
Galileo’s work also highlighted the importance of technological advancements in scientific discovery, paving the way for the development of more powerful telescopes and other astronomical instruments that continue to shape our understanding of the universe․ The use of guiding telescopes became important․
Leave a Reply
You must be logged in to post a comment.