
ge washer repair manual
Welcome to the GE Washer Repair Manual, your comprehensive guide for troubleshooting and fixing common issues with GE washing machines. Designed for DIY enthusiasts and technicians, this manual covers essential repairs, maintenance tips, and safety precautions to ensure your washer operates efficiently. Refer to the detailed sections for model-specific instructions, error code diagnostics, and genuine part replacements to restore your appliance to optimal performance.
1.1 Overview of GE Washer Models and Their Common Issues
GE offers a wide range of washer models, including top-load and front-load designs, each with unique features. Common issues across models include error codes like the 2-flash code for belt problems, leaks due to worn seals, and noise from unbalanced loads. Regular maintenance, such as cleaning filters and checking hoses, can prevent these issues. Refer to your specific model’s manual for tailored solutions.
1.2 Importance of Using Genuine GE Parts and Manuals
Using genuine GE parts ensures compatibility, safety, and optimal performance for your washer. Genuine parts are designed to meet GE’s strict quality standards, guaranteeing reliability and longevity. Manuals provide precise instructions tailored to your model, reducing errors and ensuring repairs are done safely. Counterfeit parts may void warranties and pose safety risks, making genuine components the best choice for durability and functionality.
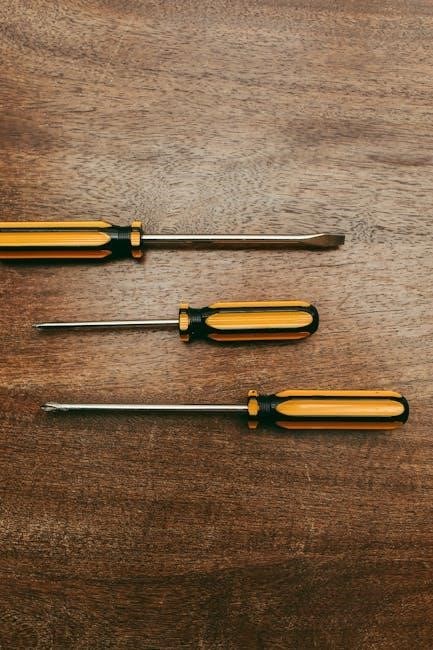
Essential Tools and Safety Precautions
Ensure you have screwdrivers, pliers, and a level for repairs. Always disconnect power and water supply before starting. Follow safety guidelines to avoid injuries and damage.
2.1 Tools Required for GE Washer Repair
Essential tools include screwdrivers (Phillips and flathead), pliers, a wrench, and a level. Additional items like a Torx driver, work light, and non-contact voltage tester may be needed for specific repairs. Gather these tools beforehand to ensure efficient troubleshooting and maintenance of your GE washer.
2.2 Safety Guidelines to Follow During Repair
Always unplug the washer before starting repairs to avoid electrical shocks. Wear protective gloves and safety glasses. Follow the Lockout/Tagout procedure to prevent accidental start-ups. Ensure the appliance is grounded and keep loose clothing tied back. Never bypass safety features, and consult the manual for specific precautions. Proper safety measures ensure a safe and successful repair process for your GE washer.
Troubleshooting Common GE Washer Problems
This section helps identify and resolve common issues with GE washers, such as error codes, leaks, noise, and failure to start. Refer to the manual for detailed solutions and ensure optimal functionality.
3.1 Identifying Error Codes and Their Meanings
GE washers display error codes to indicate specific issues. Codes like “2 Flash” signal a slipping belt, while others may point to sensor malfunctions or electronic control problems. Refer to the service manual or error chart to decode these codes, then follow troubleshooting steps to resolve the issue effectively. Proper diagnosis ensures timely repairs and prevents further damage to the appliance.
3.2 Diagnosing Symptoms Like Leaks, Noise, or Not Starting
Identify issues by examining symptoms: leaks may stem from faulty gaskets, hoses, or drain pumps. Noise could indicate worn bearings, an unbalanced tub, or loose parts. If the washer won’t start, check power supply, control panel functionality, and error codes. Inspect internal components like sensors and belts for damage. Proper diagnosis ensures targeted repairs and prevents further damage to the appliance.
Disassembly and Reassembly Instructions
Disassembling your GE washer requires proper tools and safety precautions. Remove the top panel, disconnect electrical components, and carefully take out internal parts. Reassembly ensures alignment and functionality.
4.1 Step-by-Step Guide to Disassembling the Washer
Start by unplugging the washer and removing the top panel using a screwdriver. Disconnect electrical connectors and hoses carefully. Next, remove the front panel and drain pump. Take out the tub and internal components like the agitator or impeller. Handle parts gently to avoid damage. Refer to the manual for specific model instructions and safety tips during disassembly.
4.2 Proper Reassembly Techniques to Ensure Functionality
Reassemble the washer by aligning parts precisely, ensuring all screws and clips are securely tightened; Reconnect electrical connectors and hoses carefully to avoid leaks or short circuits. Reinstall internal components like the tub and agitator, ensuring proper alignment. Finally, reattach the front and top panels, verifying all fasteners are in place. Test the washer to confirm functionality and safety.
Identifying and Replacing Faulty Parts
Identify faulty parts by referring to the GE service manual or error codes. Replace worn-out components like belts, bearings, or sensors with genuine GE parts for optimal performance and reliability.
5.1 Locating and Inspecting Internal Components
To locate internal components, refer to the GE service manual or wiring diagrams for guidance. Inspect parts like the tub, motor, and pump for visible damage or wear. Use tools such as screwdrivers and pliers to access components safely. Regularly check belts, bearings, and sensors for deterioration. Always ensure the washer is unplugged before starting inspections to avoid electrical hazards.
5.2 Instructions for Replacing Common Parts Like Belts and Bearings
Replacing belts and bearings requires careful disassembly. Align the new belt with pulleys, ensuring proper tension. For bearings, apply grease and install with a press. Use genuine GE parts for reliability. Tighten all fasteners securely and test operation. Always refer to the manual for specific model instructions to avoid misalignment or damage during replacement.
Electrical and Electronic Repairs
Diagnose and repair electrical issues by understanding wiring diagrams and control panels. Fix sensor malfunctions and electronic control problems to restore your GE washer’s functionality.
6.1 Understanding Wiring Diagrams and Control Panels
Start by analyzing the wiring diagram specific to your GE washer model, such as the GTW460ASJ4WW, to identify key components and connections. Locate the control panel, which houses sensors and electronic controls, and understand how they interact. Referencing the service manual, trace circuits to diagnose issues like error codes or faulty sensors, ensuring accurate repairs and restoring functionality effectively.
6.2 Fixing Issues Related to Sensors and Electronic Controls
Identify sensor malfunctions by consulting wiring diagrams and error codes, such as the “2 flash” code for slipping belts. Replace faulty sensors or controls using genuine GE parts, ensuring proper connections. For models like GTW460ASJ4WW, refer to the service manual for specific instructions. Always power off the washer before repairs to avoid electrical hazards and ensure safe, effective troubleshooting and component replacement.
Maintenance Tips to Prevent Future Repairs
Regularly inspect and clean the washer’s interior, check hoses for leaks, and ensure balanced loads to prevent wear and tear, extending the appliance’s lifespan.
7.1 Cleaning the Washer Regularly for Optimal Performance
Regular cleaning is essential for maintaining your GE washer’s efficiency. Run a cleaning cycle with a washer cleaner or vinegar to remove detergent residue and odors. Check and clean the gasket and drain pump filter monthly to prevent clogs. Leaving the lid open after use allows moisture to evaporate, reducing mold growth. Proper maintenance ensures consistent performance and prevents future repairs.
7.2 Checking and Replacing Wearable Parts Proactively
Regularly inspect wearable parts like belts, bearings, and seals to prevent unexpected failures. Replace worn components before they cause further damage. This proactive approach maintains optimal performance and avoids costly repairs. Always use genuine GE parts for reliability. Consult your manual for specific guidelines on inspection intervals and replacement procedures to keep your washer running smoothly and efficiently over time.
DIY Repair vs. Professional Service
Evaluate your technical skills and the complexity of the issue when deciding between DIY repair and hiring a professional. Consider cost, safety, and reliability to make an informed decision for your GE washer repair needs.
8.1 When to Attempt a DIY Repair
Attempt DIY repair for minor issues like replacing belts, inspecting lid switches, or tightening loose parts. Ensure you have basic tools like screwdrivers and pliers. Refer to the GE repair manual for guidance and use genuine parts for reliability. Assess your technical skills and the problem’s complexity before starting. Always prioritize safety and follow instructions carefully to avoid further damage or personal injury.
8.2 Knowing When to Call a Certified GE Technician
Call a certified GE technician for complex issues like electrical malfunctions, sensor problems, or model-specific repairs requiring specialized knowledge. If you encounter safety risks, such as faulty wiring or unstable machinery, professional assistance is essential. Additionally, for warranty validity and ensuring repairs meet manufacturer standards, rely on authorized technicians who use genuine GE parts for reliable and long-lasting solutions.
Model-Specific Repair Guides
This section offers detailed repair guides tailored to specific GE washer models, ensuring accurate troubleshooting and maintenance for optimal performance.
9.1 Repair Instructions for Front Load vs. Top Load Models
Front load and top load GE washers have distinct designs, requiring tailored repair approaches. Front loaders often involve gasket replacement and drainage system checks, while top loaders may need lid switch or agitator repairs. Understanding these differences is crucial for effective troubleshooting and ensuring model-specific solutions are applied correctly to restore functionality and performance.
9.2 Special Considerations for High-Efficiency Washers
High-efficiency (HE) GE washers require specific care due to their advanced technology. Regular cleaning of the tub and gasket is essential to prevent mold buildup. Using HE detergent prevents excessive suds, which can damage sensors. Additionally, ensuring balanced loads and checking drain pumps regularly maintains optimal performance and energy efficiency, prolonging the lifespan of your appliance.

Accessing Official GE Repair Manuals
Visit the GE Appliances website to download official repair manuals by entering your model number. Access PDF service manuals, troubleshooting guides, and wiring diagrams for accurate repairs.
10.1 How to Download PDF Service Manuals from GE Appliances
To download PDF service manuals, visit the GE Appliances website and enter your washer’s model number in the search bar. Locate the “Manuals and Downloads” section, select the desired document, and choose the PDF format. Follow the prompts to download the manual, ensuring you have the latest Adobe Acrobat Reader for viewing. This provides detailed repair guides, wiring diagrams, and troubleshooting steps for your specific model, aiding in efficient diagnostics and fixes.
10.2 Navigating the GE Appliances Website for Resources
Visit the GE Appliances website and navigate to the support section. Enter your washer’s model number in the search bar to access specific resources. Explore the “Manuals and Downloads” tab for PDF service manuals, installation guides, and energy efficiency information. Additional resources like quick specs and troubleshooting tips are also available, ensuring you find everything needed for repairs and maintenance in one convenient location.

Common Mistakes to Avoid During Repair
Avoid damaging electrical components during disassembly. Ensure proper alignment and tightening of parts to prevent functionality issues. Always follow safety guidelines and use genuine GE parts.
11.1 Avoiding Damage to Electrical Components
To prevent electrical damage during repair, always disconnect power before starting. Use insulated tools to handle components, and avoid touching sensitive circuitry. Ground yourself to prevent static discharge. Never force connections or bypass safety features. Refer to wiring diagrams in the manual for proper procedures. Improper handling can lead to irreversible damage or safety hazards, so proceed with caution and ensure all steps are followed carefully.
11.2 Ensuring Proper Alignment and Tightening of Parts
Proper alignment and tightening are crucial to prevent damage and ensure functionality. Always use torque specifications from the manual to avoid over-tightening. Align parts precisely before securing to prevent wear or misalignment. Tighten bolts and screws in the recommended sequence to maintain balance. Double-check connections to ensure stability and functionality. Improper alignment can lead to noisy operation or premature wear, so attention to detail is essential during reassembly.
Additional Resources and Support
GE Appliances offers extensive support through their official website, including downloadable manuals, customer service contacts, and online forums for expert advice and troubleshooting assistance.
12.1 GE Customer Support and Service Centers
GE Appliances provides dedicated customer support and authorized service centers to assist with washer repairs. Visit the official GE Appliances website to access contact information, locate certified technicians, and find nearby service centers. Their team offers troubleshooting guidance, repair scheduling, and genuine part recommendations. For convenience, online resources like manuals and repair guides are also available to help resolve issues efficiently.
12.2 Online Communities and Forums for Repair Advice
Online communities and forums are invaluable resources for GE washer repair advice. Platforms like RepairClinic.com, ApplianceBlog, and specialized DIY forums offer practical solutions, troubleshooting tips, and repair experiences. Users can share issues, seek guidance, and learn from experts and DIY enthusiasts. These communities provide access to repair manuals, part recommendations, and step-by-step instructions, fostering a collaborative environment for resolving washer-related problems effectively.
Leave a Reply
You must be logged in to post a comment.